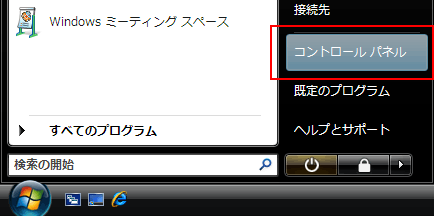
スタートメニューから「コントロールパネル」をクリックします。 |
 |
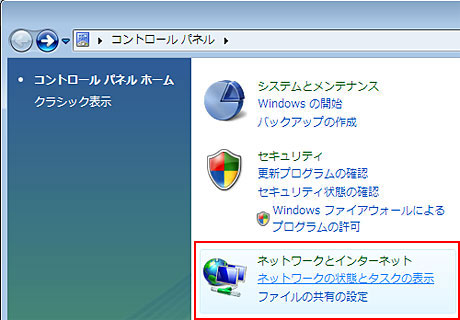
コントロールパネルから「ネットワークとインターネット」の中にある「ネットワークの状態とタスクの表示」をクリックします。 |
|
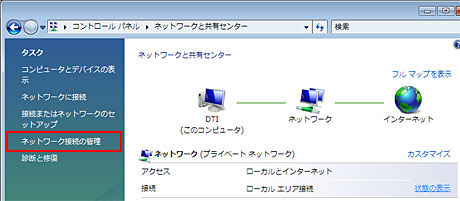
「タスク」から「ネットワーク接続の管理」をクリックします。 |
|
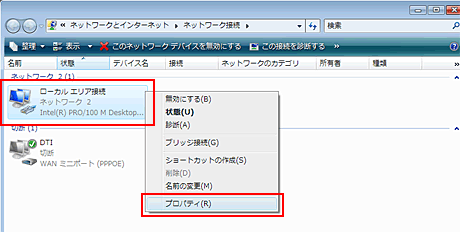
「ローカルエリア接続」を右クリックし、「プロパティ(R)」をクリックします。
※この際、Windows Vistaのユーザーアカウント制御(UAC:User Account Control)機能により、確認を求められますので続行を選択してください。
|
|
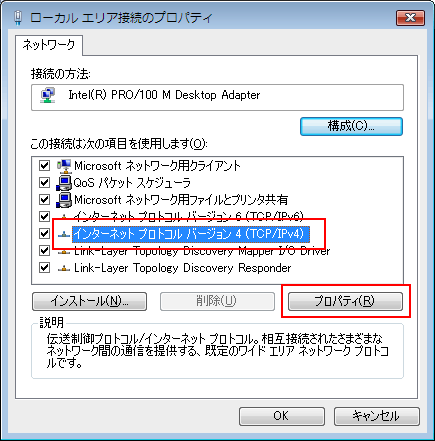
「インターネットプロトコル バージョン 4(TCP/IPv4)」を選択し、「プロパティ」をクリックします。 |
|
「全般」タブを選択し、それぞれ以下のように設定します。
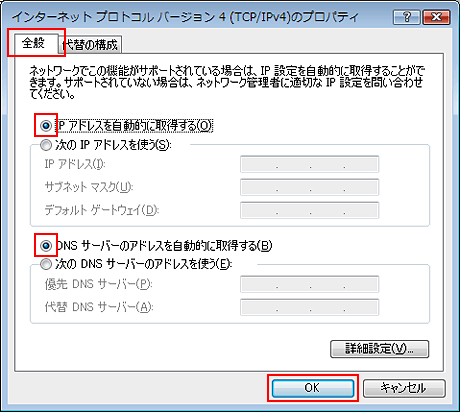
| IPアドレスを自動的に取得する |
チェックする |
| DNSサーバーのアドレスを自動的に取得する |
チェックする |
|
「OK」をクリックします。 |
![設定マニュアル[インターネット接続設定]](../../image/manual_subtitle01.gif)
